I realized that some artists make work in progress (WIP) updates, and they're quite enjoyable. It's fun to see what they're doing, how they organize their work area, even how messy or neat they are. Well I decided I would try to make some myself and see how it goes. I decided to start with roses, because that's what I was crafting when I decided I wanted to make this kind of blog entries.
Please keep in mind that my WIP photos will be a bit "raw". I don't want to spend too much time editing them or trying to find a good lighting, so please forgive the relative low quality. Pretty much the only thing I did was crop them so the files aren't too big.
So, this is how my petals start, pretty much a skinner blend bull's eye cane. I don't worry about making it too perfect, roses aren't perfect after all. I cut slices and then cut them in half. I find it easier this way.
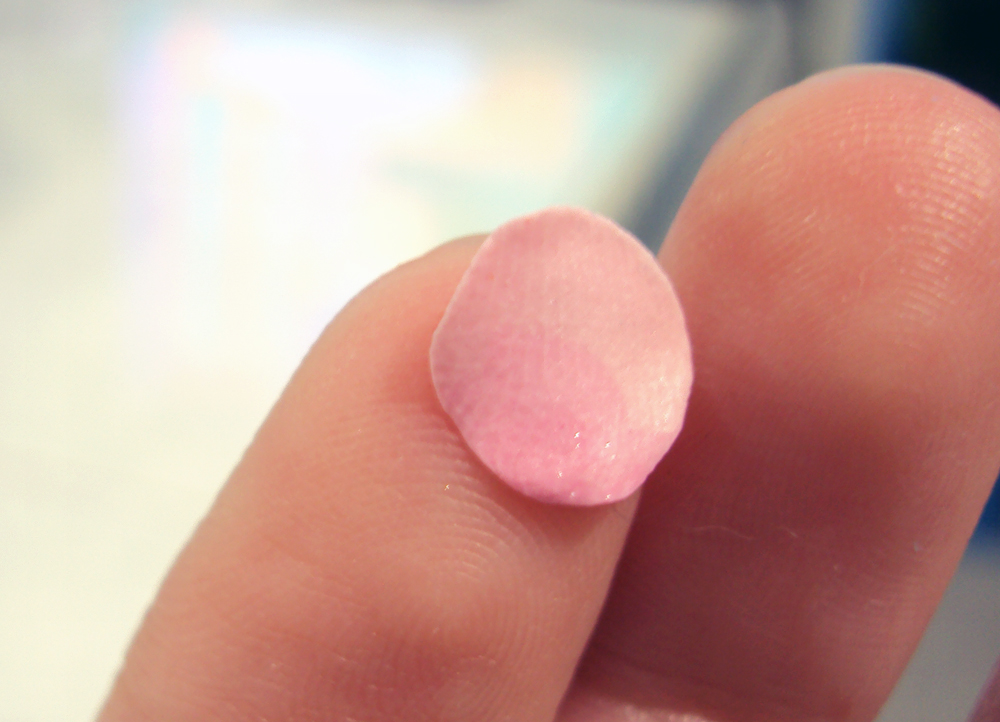
Then I flatten the petals one by one. I like to shape them like a real petal, I know a lot of people like to make circles but making petals makes sense to me. It helps me.
Here's a bunch of them ready to be used. I swear that paper is clean! The greasy spots you see is the plasticizer being leeched out of the clay, that's actually a very useful technique for which I plan to make a tutorial one day.
Here's a couple of finished roses, ready to be baked. Notice the tv's reflection in the baking pan, having a good tv show or movie is an essential step of my creative process. My favorite are old movies I've already seen so I don't get distracted, but good enough to get me in a good mood. We also watch re-runs of Friends for the 1000th time.
That concludes my first WIP. I can already tell that it's very poor and uninteresting. I didn't take photos of me making the roses because I can't yet figure out how to do it, making roses requires that I use both my hands all the time. I plan to make a tutorial for this, as soon as I can figure out a way to take photos.
Showing posts with label polymer clay. Show all posts
Thursday, October 27, 2011
Talty's WIP #1 Roses
Sunday, April 10, 2011
Mica shift experiments
My first polymer clay blog! yay! I've meant to start writing them for a while, but I suppose I was lazy. I will start writing about a new favorite, the mica shift technique! This techniques yields some of the most amazing results I've seen, it's like an optic effect that leaves everyone I've shown it to mesmerized.
Mica shift is this thing when you align the mica particles in polymer clay, then you somehow disturb them again to produce interesting effects. Most people use stamps, because when you press the stamp in the clay and cut the raised parts, the pattern appears to be 3D while also being completely flat! It's a lovely optical effect.
I'm sorry I didn't take photos of the process, I will next time. I used Premo metallic because I read somewhere that Premo has more mica, so the effect is more stunning. The most difficult part was aligning the mica particles, because I had to use a rolling pin... it wasn't really hard, but time consuming. Sanding down the pendant was very time consuming too because I did it manually using wet/dry sandpaper.
I don't know why, but at the time I got obsessed with making a dark red pendant. I thought that this would be the perfect opportunity to make that pendant and trying the new technique, so this was my first experiment:
I think that it was fairly decent for my first time, even with the uneven spot on the left side. It's more amazing in person, but it does look 3D! I somehow had the feeling that the 3D effect could be more noticeable, and I remembered reading that the mica shift effect was usually less bold when using red clay. So I made another try with golden premo:
It's sooooooo much prettier! The "carved" parts look deeper with gold clay than with red, so the 3D effect is so much more stunning. I also did a better job sanding/buffing this piece, so it's completely smooth. This is incredible, I love it so much :D
When I was sanding the clay, I noticed that the effect was bolder when the piece was wet. It somehow got into my mind, and I started to ask myself if it would look "more 3D" with a nice layer of gloss...
It totally does!!!
A side photo, so you can see that the surface is totally flat.
This was a very fun experiment. I already got a couple of requests for more pendants, they're surely fun to make and I love the way they look! I hope you can appreciate it from the photos, I did my best to make the pendants look as they do in real life... but the mica shift effect may be something you must admire in person.
I will post a new tutorial soon :)
Etiquetas:
jewelry,
mica shift,
pendant,
polymer clay,
premo,
Talty
Subscribe to:
Posts (Atom)


